Title: Introducing MetaMask: A Powerful Tool for Secure Web3 Wallets
Introduction
As the world becomes increasingly digital, online transactions are becoming an integral part of our daily lives. However, with great power comes great responsibility, and secure wallets are crucial to protecting user funds from potential threats. In this article, we’ll explore how to integrate MetaMask into your website, a popular Web3 wallet solution that allows users to link multiple wallets to one account.
Why MetaMask?
MetaMask is one of the most widely used Web3 wallets and is known for its simplicity and ease of use. Its open-source code ensures maximum transparency, allowing developers to build on it without worrying about security concerns. MetaMask allows users to connect their existing wallets from different platforms like Ethereum, Binance, and more, making it an ideal solution for websites that require multiple wallet links.
How to Integrate MetaMask into Your Website
To integrate MetaMask into your website, you need to follow these steps:
- Choose a Web3 wallet provider: You can use MetaMask as a third-party provider or rely on MetaMask’s own Web3 wallet API. In this article, we’ll focus on the latter.
- Set up MetaMask API: Log in to your MetaMask account and navigate to the Settings page. Click on “Wallets & Accounts” and then click the three vertical dots next to your wallet name. Select “API Access” and create an API key.
- Create a Web3 wallet object: In your website’s code, you need to create a Web3 wallet object that can communicate with MetaMask. You can do this using JavaScript or other programming languages supported by the MetaMask library.
- Set up dialog: After creating the Web3 Wallet object, you need to set up the Select Account dialog. This will prompt users to select their existing wallets from MetaMask.
Select Account Dialog
When a user clicks the Add More Wallets button, they will be presented with the Select Account dialog. In this dialog:
- Wallet Name

: A dropdown list of available MetaMask wallets.
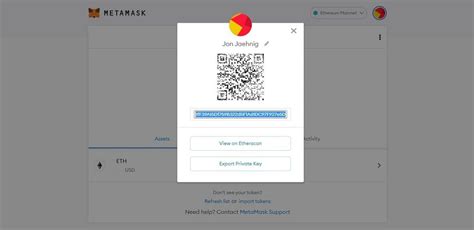
- Address: The wallet address associated with this account.
- Name: Optionally, you can add a custom name for the selected wallet.
Sample Code
Here is a sample code snippet in JavaScript that shows how to create a Web3 Wallet object and set up the Select Account dialog:
// Import the MetaMask library
const MetaMask = window.MetaMask;
// Set up the Web3 wallet object
const walletObject = new MetaMask.Web3Wallet({
provider: '
});
// Set up the Select Account dialog
function selectAccount(walletName) {
const address = walletObject.selectedAddress;
return {
label: ${walletName} (${address}),
value: address,
};
}
// Event listener for Add more wallets button
document.getElementById('add-more-wallets').addEventListener('click', () => {
const selectedWallet = selectAccount(document.getElementById('selected-wallet').value);
// Proceed with the transaction
});
Conclusion
In this article, we explored how to integrate MetaMask into your website and set up a “Choose your account” dialog. By following these steps, you can provide users with a seamless experience when linking multiple wallets to one account. Whether you are creating a new project or an existing one, MetaMask is an excellent choice for secure Web3 wallet solutions.